I am always looking to let my creativity go a little wild. The alligator gar project let me experiment with mixing mediums: woodworking, painting, and resin. I enjoyed it very much so when my sister messaged me about wanting something similar with an octopus, I was excited to start a new project.
I had a piece of wood that would work perfectly, and after finding out a little more about her tastes, I sketched out the design, while coming up with a game plan. I find that deciding “what” to do is often harder than the actual “art” part.
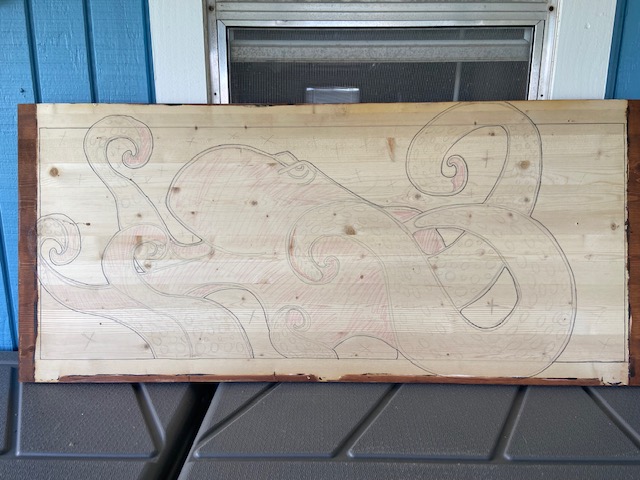
After choosing “what” I was going to do, I needed to figure out “how” to do it. It didn’t take long to figure out if I was going to need to do this project in steps or phases. The first step was to carve out the “body” and a few top parts the legs. I didn’t want to get confused, so I colored in the first section that would be carved out. I also put an “x” where the water would be and put quick little circles as suckers for the legs.
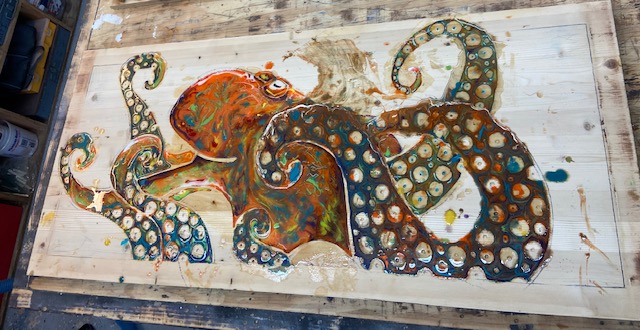
You may notice that this octopus only has 7 legs, that’s because Shark week had just ended, and this little guy lost one of his legs to a shark attack. There’s a story there, but we’ll save that for later.
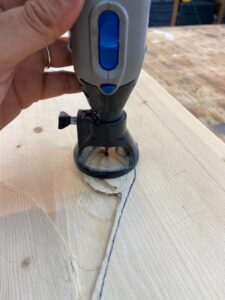
I used a regular-size router to carve out the larger sections but used the Dremel with the router attachment for the finer detailed areas. Here I am carving around the eye.
You may also notice the double line. As I decided I would be using more resin on this project, I was going to need to control where the resin “flowed”. I needed to make sure the resin wouldn’t go all over. I also thought the wood outline might just add to the piece.
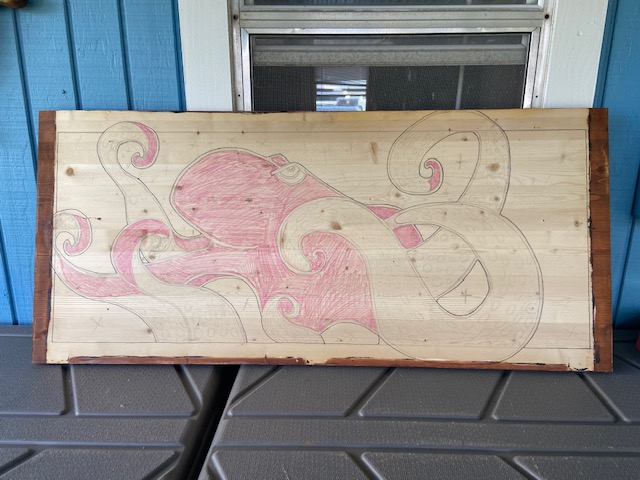
After carving out the “body” parts that would be the same resin pour, I added a little dark and light paint to help remind me where I wanted the shadows and light to be. I took my time to check and double-check how I was going to pour, especially in the smaller sections.
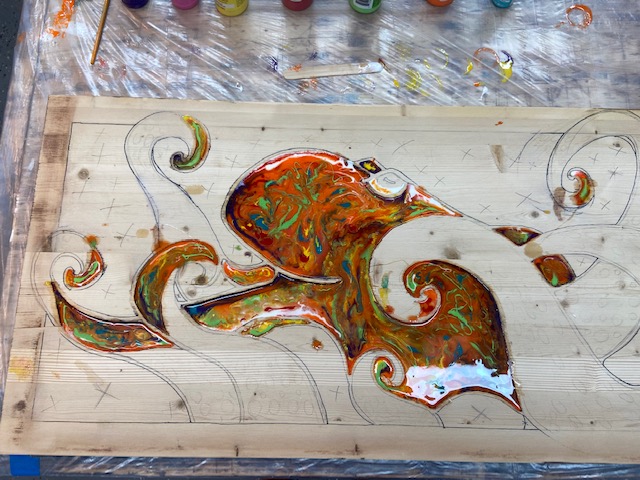
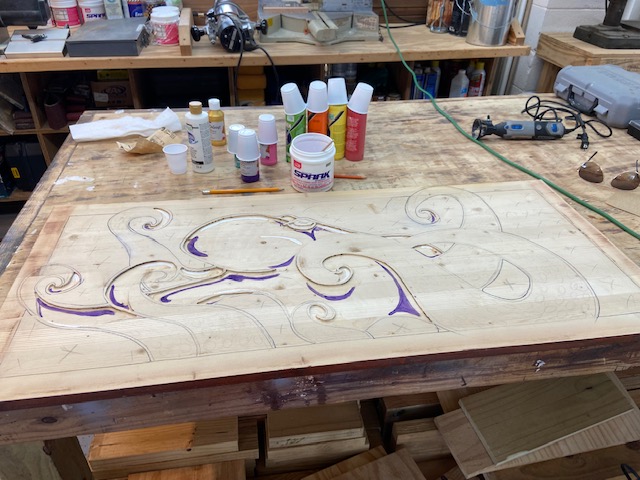
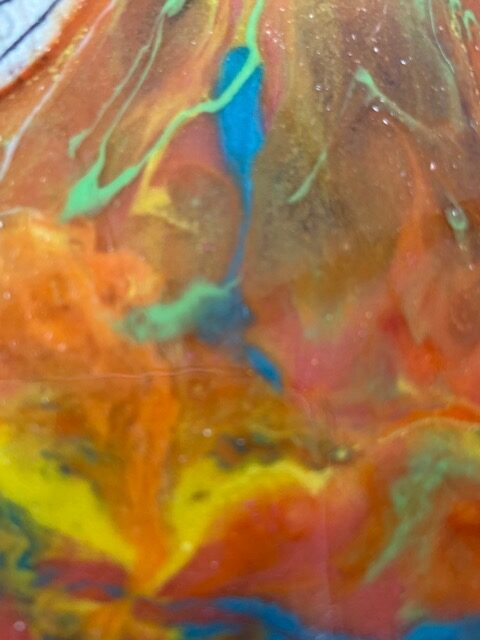
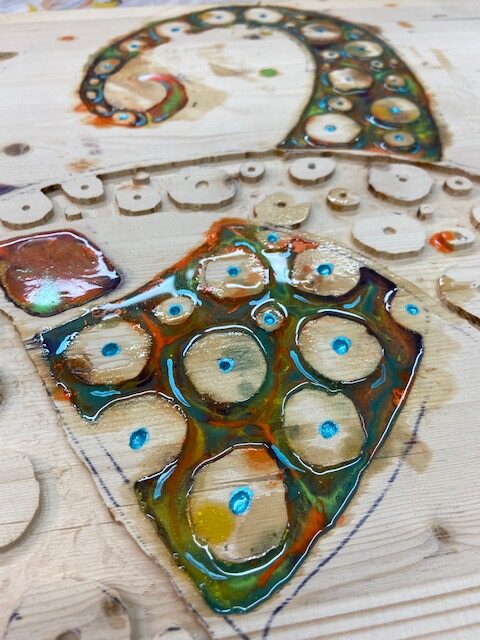
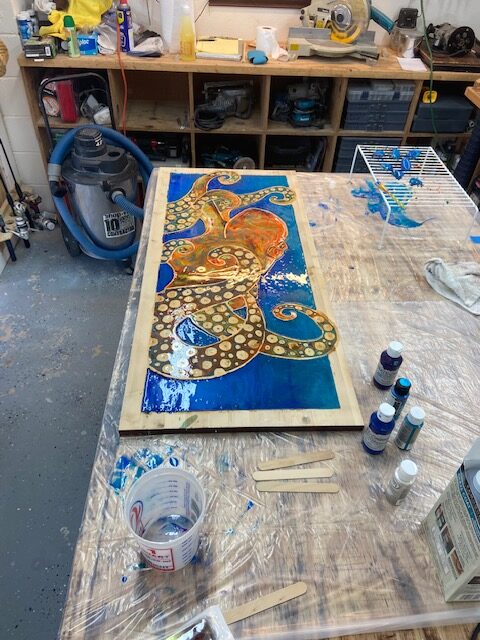
My sister loved the idea of multi-color, tye-dye, colored octopus, she had also said her favorite colors were orange and teal. I mixed up seven different colors with orange being the base color. One of the things I love about resin is how with some careful pouring the colors are in layers at different depths. In the next picture, it’s a little blurry, but you can see what I mean about the colors being at different depths.
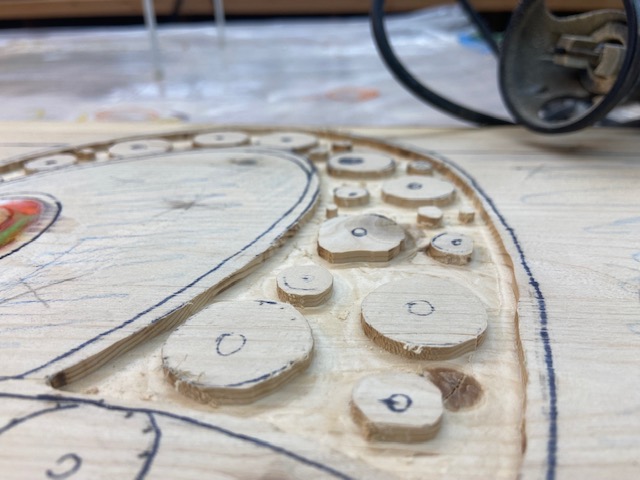
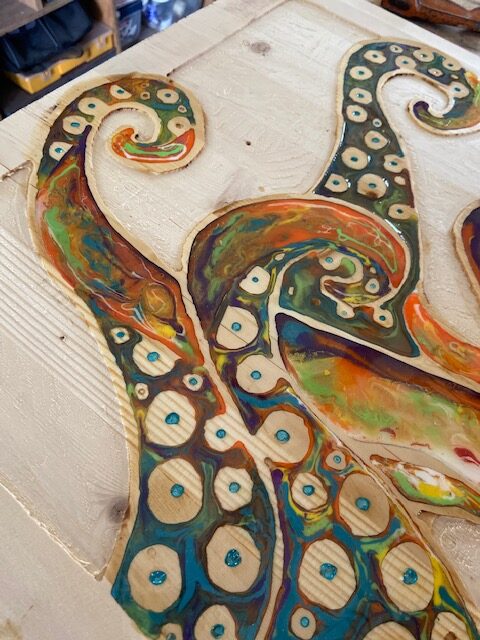
The next step is to start carving out the legs. I wanted to leave the suckers raised, I wasn’t sure exactly what I was going to do with them, but as I router-ed out each leg, I tried to keep them as round as I could. To get a little better circles, I used three different “hole saws” pressed them on an ink pad and used those to sketch the circles for the suckers. In the below photo you can look at the bottom left sucker you can see “dots” that were left by inking the hole saw.
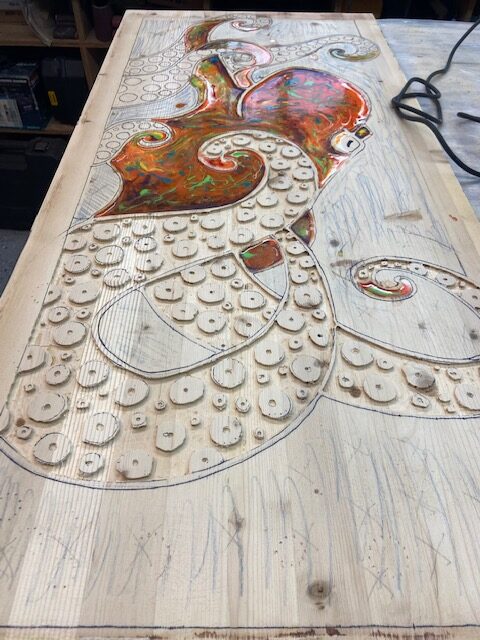
As I kept carving the legs, I really liked how this piece was taking shape. I also needed to remember what was getting carved out and what wasn’t. I went ahead and “colored” the water areas with a colored pencil so I didn’t lose track of which lines were which.
Pouring the legs was a little more difficult than I thought it would be. First, the colors weren’t cooperating as they did on the body, I wasn’t really sure I liked the color combination, and I was getting resin all over the top of the suckers. I wasn’t concerned by resin spills where the water would go because it would get carved out. But I did manage to get it on the outside frame that took a little extra sanding to clean up.
Mistakes happen. As you can see in the below photo, You can see that I accidentally spilled too much resin. I learned a few lessons here…first don’t spill resin. Second, don’t try to “scrape” it off, and finally, don’t try to plan and control too much, just let it flow. I played with the resin and the colors a little too much and the colors mixed more than I would have liked. I wasn’t a disaster per se, but I would have liked the colors to have a little more depth.
The wonderful thing about this project is that mistakes can be “erased”. After a little grinding on the resin and sanding, the suckers are back to raw wood, and the mess is all cleaned up.
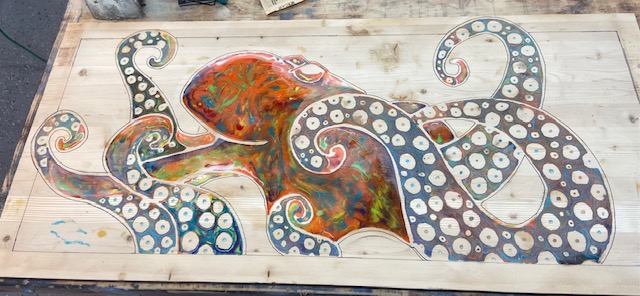
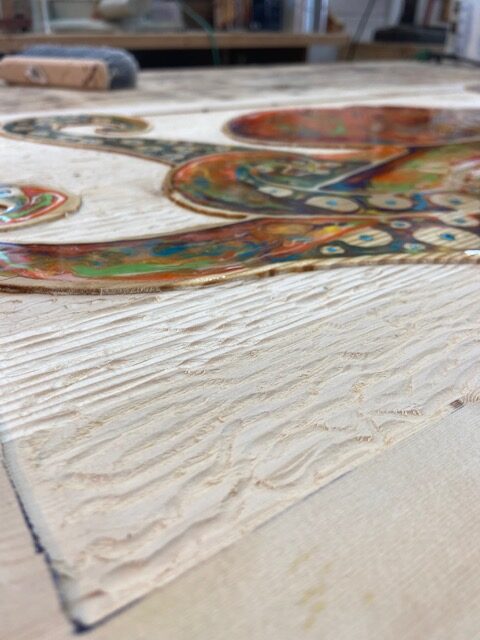
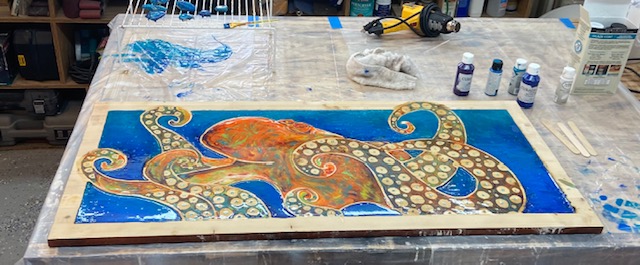
Here’s a close-up, you can see the sanding removed the shine from the resin, but the colors actually turned out pretty well. Also, the areas for the water have been carved out leaving a raised frame. I purposefully wanted legs extending onto the frame
Another view of the background carving.
My sister really liked how the water on the alligator gar project turned out, so I planned on doing this water the same way. I used the Dremel to carve waves in the water. But sometimes, plans change.
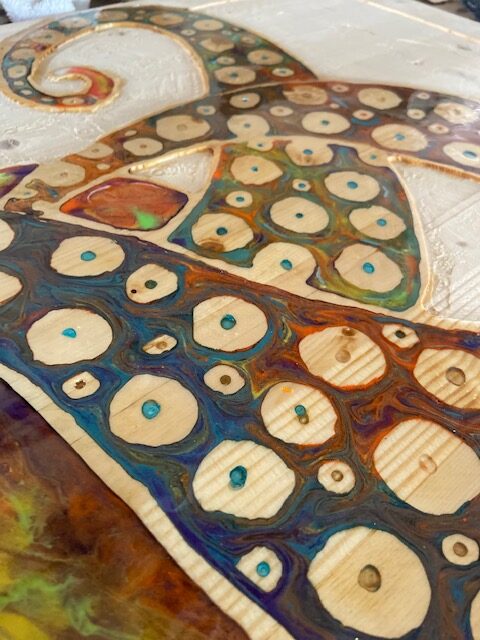
Again, I used a little too much resin and ended up filling up one of the smaller sections of water. WOW! I loved the deeper colors, the light sparkle, and how it looked being the same height as the octopus.
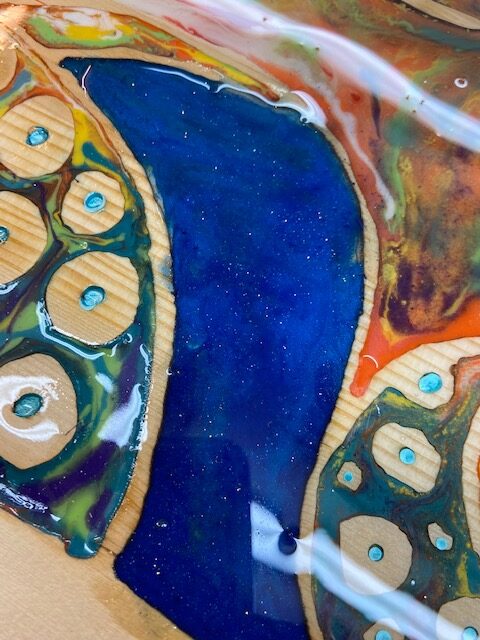
I ended up doing a much larger pour than I originally planned, and covered all of the water waves I had carved out, but the shades and the depths of the blues really helped the rest of the octopus “pop” out. Again, sometimes you just have to go with the flow.
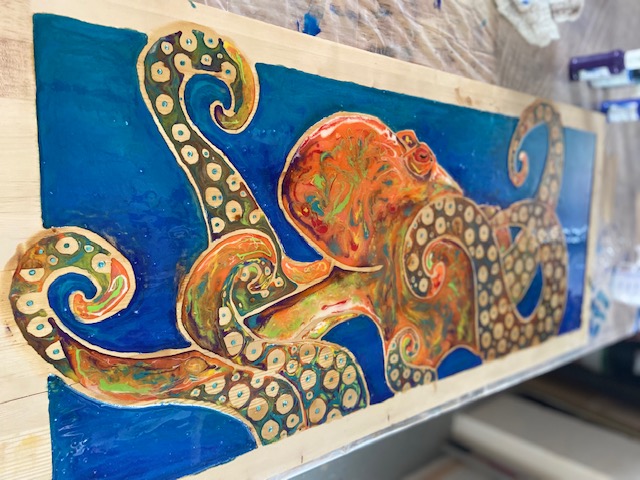
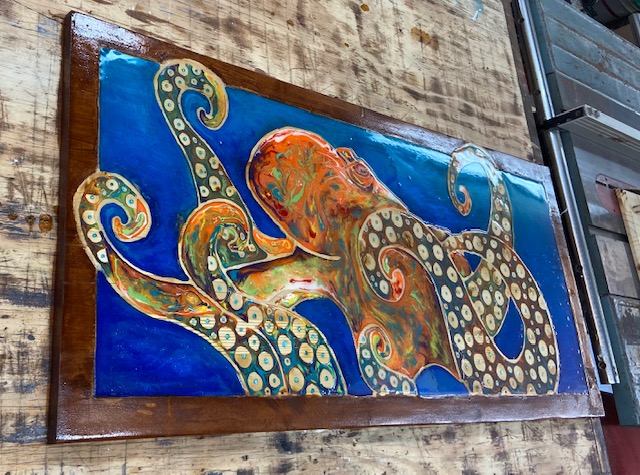
A few different shots of the finished water.
The last step was to stain the outside frame. Because of the powerful colors of the resin, I thought the darker frame would help tie it all together.
The only downside to resin art is the shine causes a glare which makes it very difficult to take good pictures. These photos really don’t do the piece justice, you really don’t get to see the depth of colors. Hopefully, the short video at the very end will give it the justice it deserves. (Make sure to see it in full screen). I sure had fun with this one and cannot wait for the next project.
I am the lucky sister who got to receive this beautiful piece! My heart sprang and I almost cried when I saw it. It is absolutely beautiful. You can see every layer close up. I can feel both the love and enjoyment that was behind this art. Octopuses are my favorite animal so it’s an honor to have a piece made by my sister that I’ll get to cherish forever.