
Where we live there is an abundance of alligator gar. An interesting prehistoric-looking fish that looks more dangerous than it really is, at least to humans. As I was plotting my next creative endeavor, I was cleaning the workshop and managed to sort and organize the giant wood pile under the work table. We have a lot of scrap wood, so I began to play with ideas of how to mix my artistic talent with power tools!
I saw a painted gar online and I really liked the way the body curved. It wasn’t the boring side-view. I sketched out the basic design and began to decide on how to bring this fishy to life.
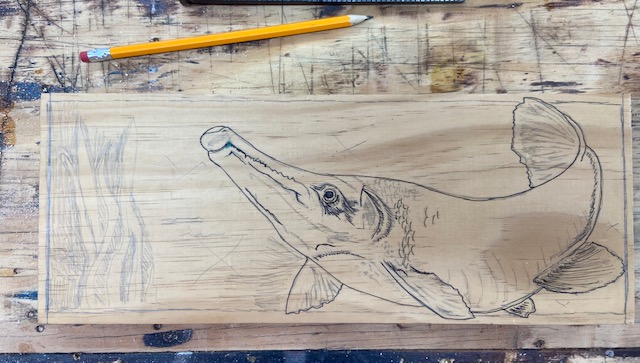
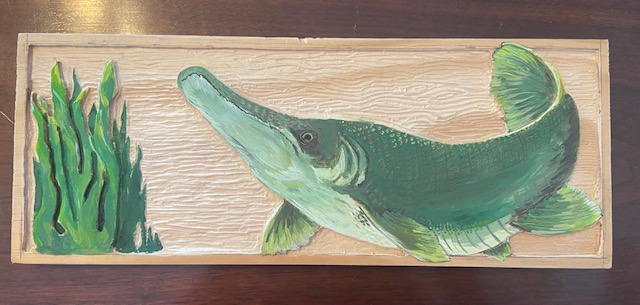
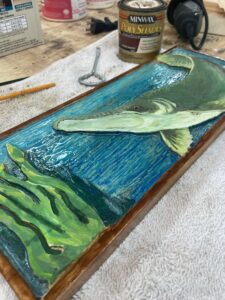
You can see by the pencil in the picture this is not a huge project piece. I wanted to give it a shot on a smaller “canvas” and see how that turned out before making something larger.
I actually asked my boyfriend for help. I was using the router attachment on the Dremel and he said he could use the “big” router a whole lot faster. So I let him. It had a nifty look, but I wanted a more artistic touch.
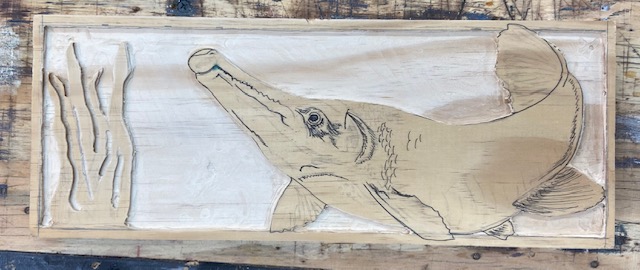
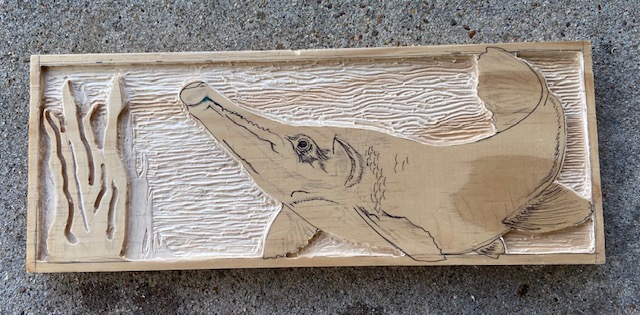
I decided I wanted the fishy to really stand out. I thought adding another lower layer of weeds might enhance the depth. For the “water” background, once I had the initial depth, I wanted that “wave” so I used a Dremel with a small round carving bit and started carving lines. I was sure not to be too careful or precise and let the grain of the wood tug the carving.
With the design carved, I thought I should start painting and bring this little guy to life. I played with many different greens, a little neon, a little yellow, a dab of black, and a dollop of white to try to create the perfect shades and shadows.
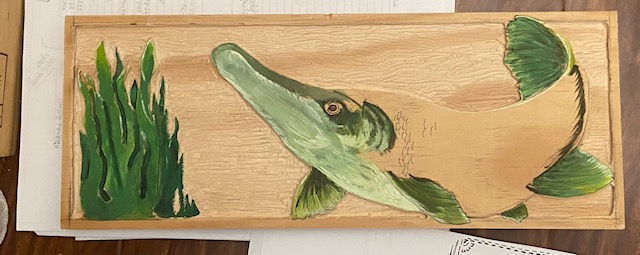
One thing I love about painting is if you don’t like it, who cares, paint right over the top of it. That’s what happened as I tried a few times to get the scales. I’m still not 100% pleased with how they turned out, but I also knew this may never get finished if I kept playing with trying to get them “perfect” I also didn’t want the scales to overpower the entirety of the fish. Just a hint, and let the imagination fill in the rest.
The background. I toyed with many ideas on how to turn the background blue. I thought about painting each carved-out line in one shade and putting a lighter shade on top. I thought about a blue stain. I started wondering about epoxy resin. I had created beach scenes, and I loved how it gave the water depth. However, what I wanted to avoid was filling in all the carving. I didn’t want to resin to be on the same level as the fish. I knew I wanted to cover the background weeds, but I didn’t want to do more than one layer of resin.
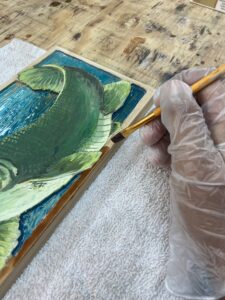
This idea was going to be tricky, because I need at least three different shades of blue, “paint” the resin into the smaller areas and around the weeds, and I had a little less than 10 minutes. With 2-part epoxy resin, you have about 10 minutes to work it before it starts to harden. I would need to mix the 2 parts, stir for at least 1 minute, divide into smaller cups (plastic shot cups work wonderfully), stir in the blue shades, pour and spread before it starts turning “stringy”. I “poured” the two smaller areas first, and used way too much. I grabbed one of my paint brushes and actually started to take some out and spread it to other areas. I aimed for about halfway up for the darkest blue and used a dark turquoise for the middle and light turquoise for the lightest color at the top. I used the brush to blend them a little bit, and there’s the buzzer, time is up. It is what it is, there’s no going back, no adding, no subtracting.
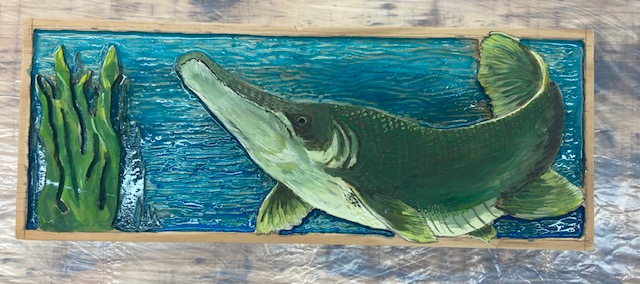
Although, I love how it turned out! I was able to color the background without filling it, each carved-out line is visible, and the background weeds got a little darker and farther away. I was pretty happy with the end product and am glad I tried this experiment.
The air bubbles are not that noticeable from a distance, but here you can see how that resin stayed transparent enough not to cover all the wood. The majority of the color sank beautifully into the groves.

Epoxy resin is known for getting air bubbles. On my beach scenes, I would take a heat gun and pop as many as I could. However, for this water, I actually wanted as many air bubbles as I could get. I liked the idea that there were air bubbles in the water because Gar’s can actually breathe air and release air bubbles when they float to the surface.
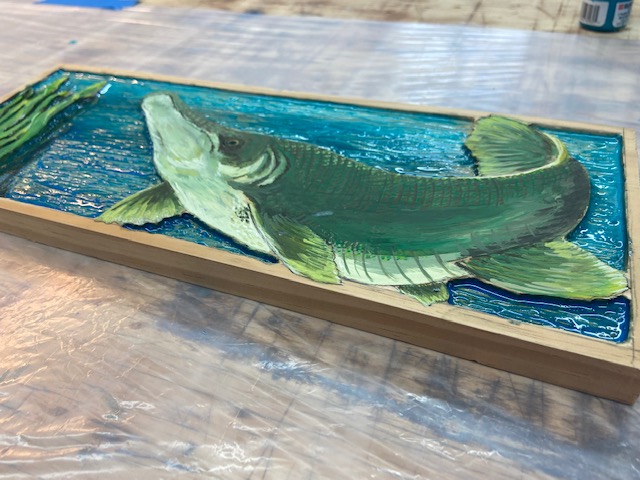
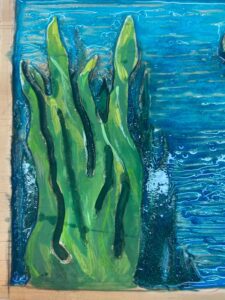
A closeup of the weeds. I could have probably painted the dark green lighter since the blue in the resin would taint and darken them, but I am still happy with how they turned out. I wasn’t quite fast enough as you see how the resin in this corner really didn’t spread and layout. It was the last color on the last corner and I think I was over my 10-minute mark.
The last touch was gently sanding the border and staining it. I left the stain on pretty thick to get that dark glow.
Amazing work !!